Quick development of bluetooth-based costume props using Arduino and ESP32
11 Nov 2019We hosted a Halloween party for some friends last week, and I wanted to integrate my costume (whatever it was) with the house decorations. I only had a handful of evenings available to get everything up and running, so I had to build something just complex enough to entice guests to play with it. Preferably using parts I already had in the lab.
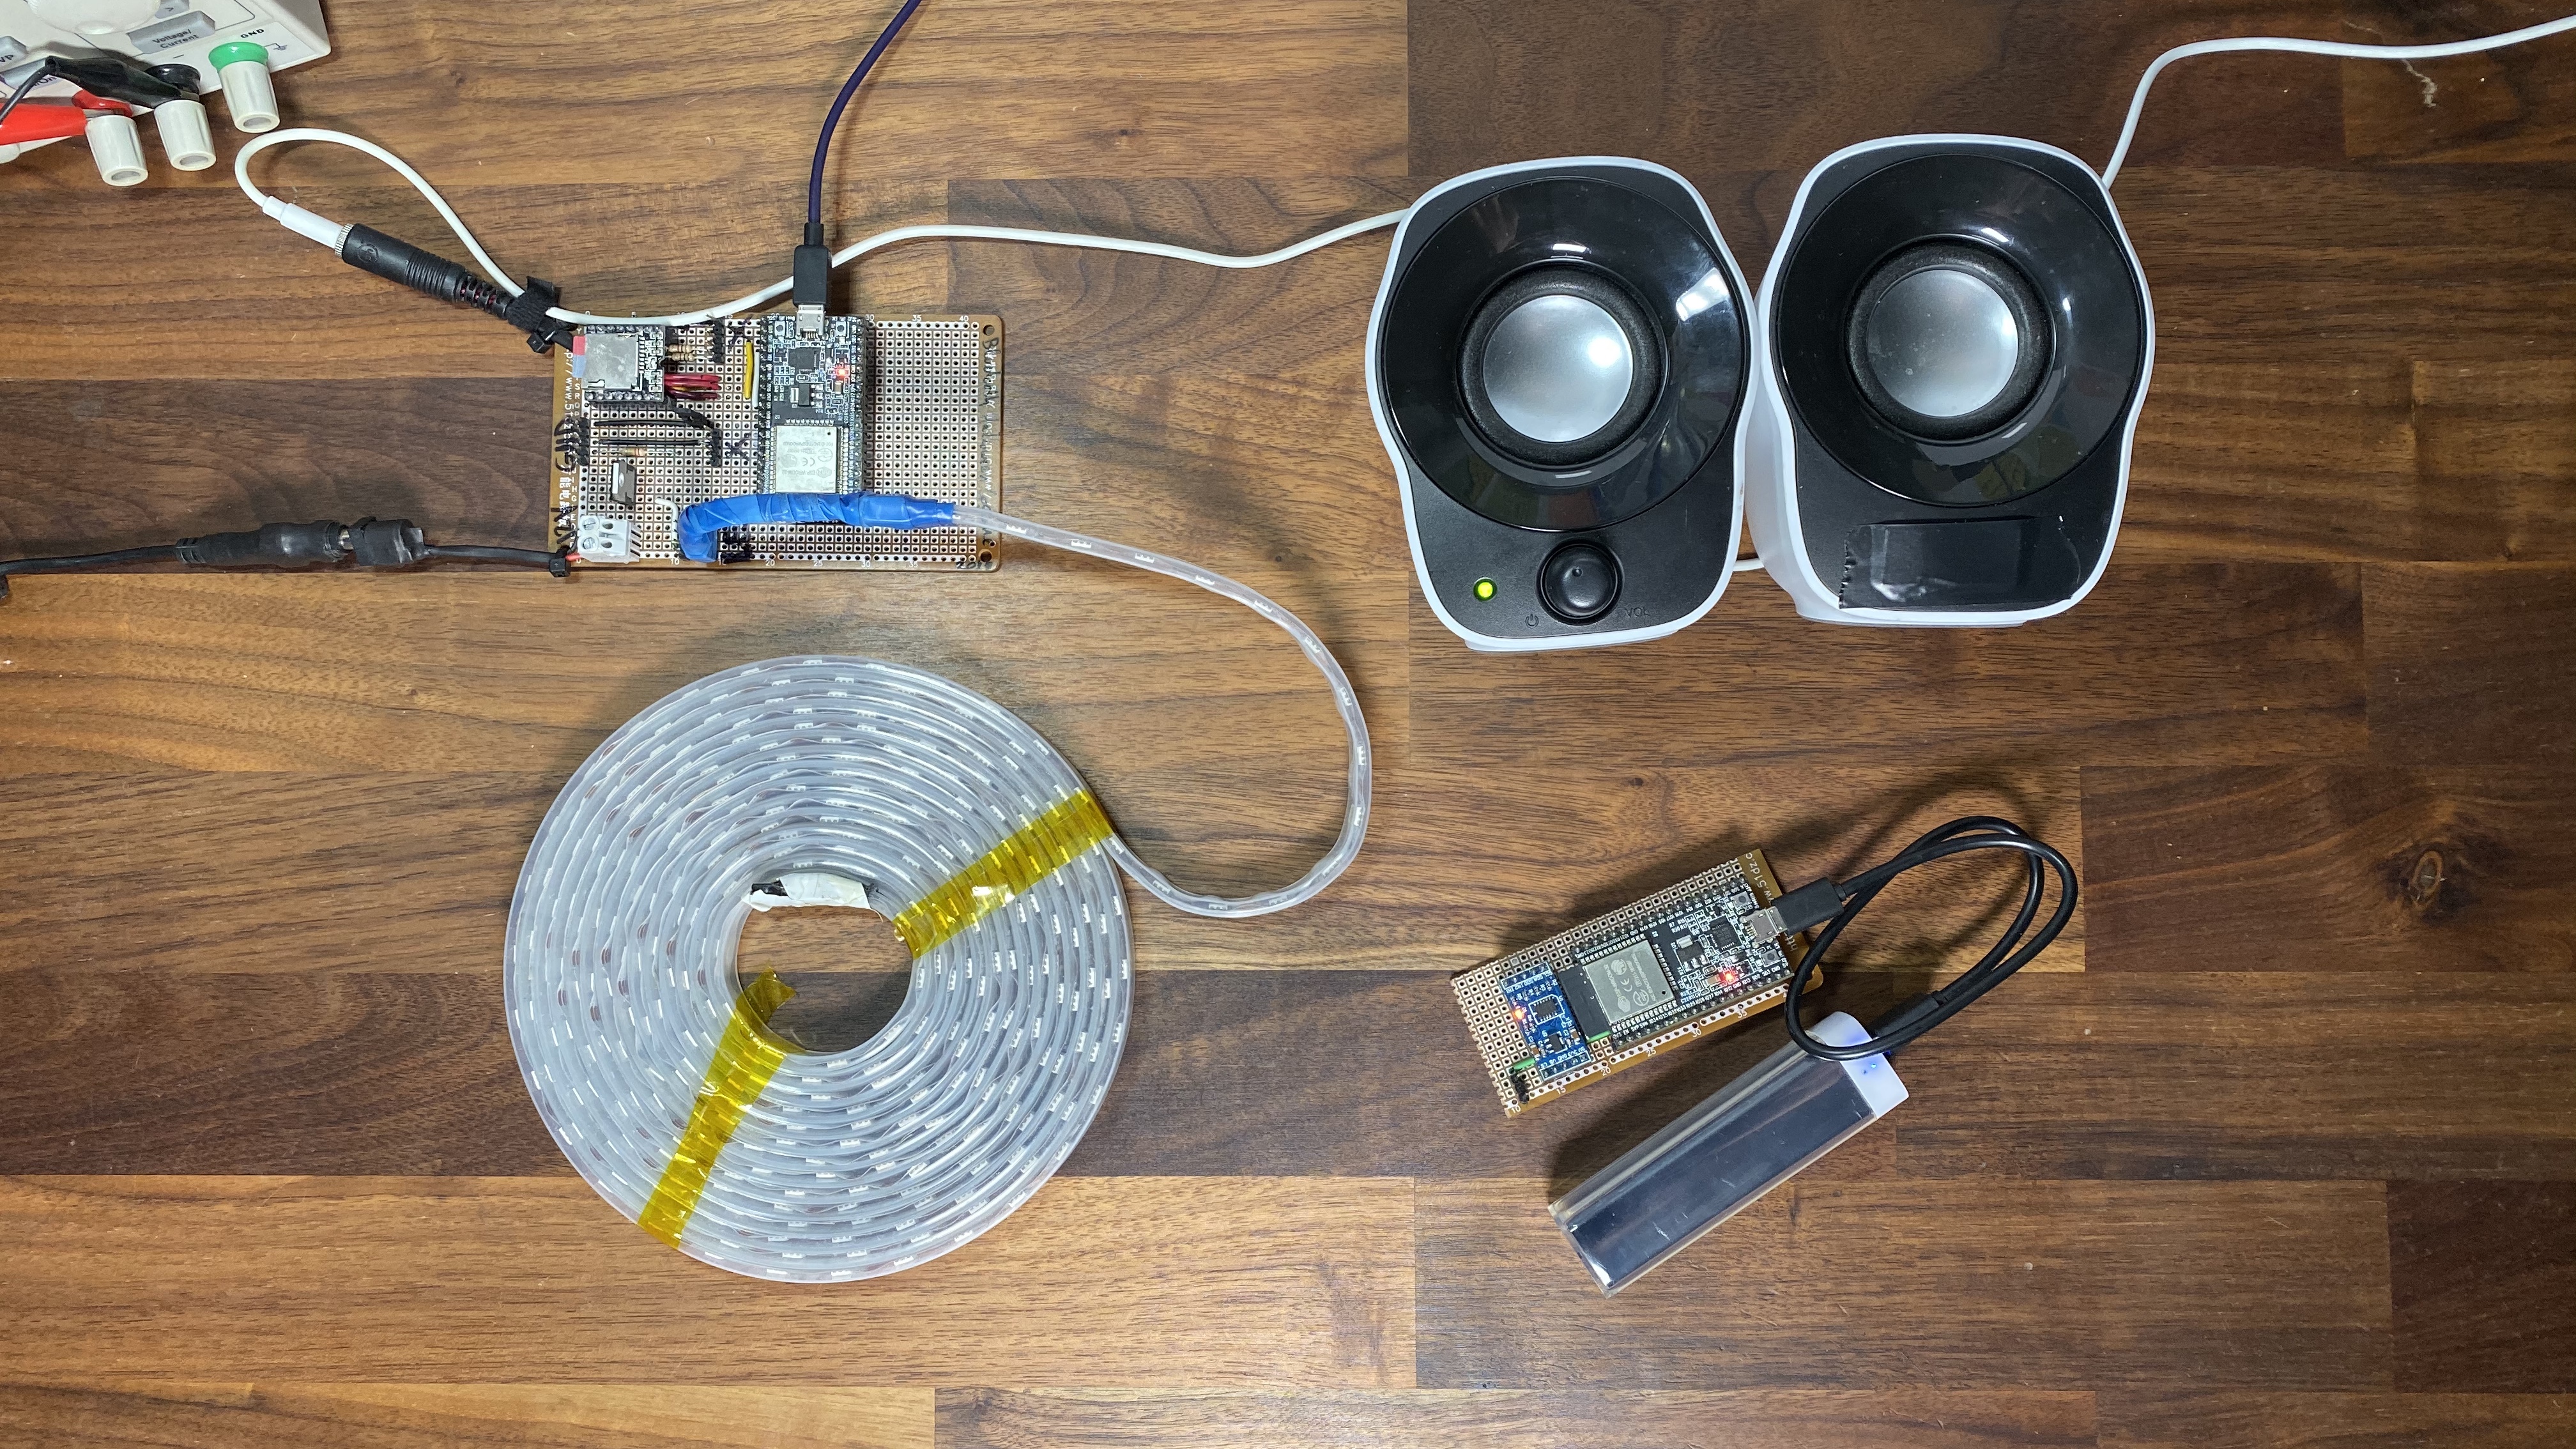
Here’s the final product:
This post describes the final solution, pitfalls I ran into, and the reasoning behind some decissions.
The Hardware
The BLE GATT server
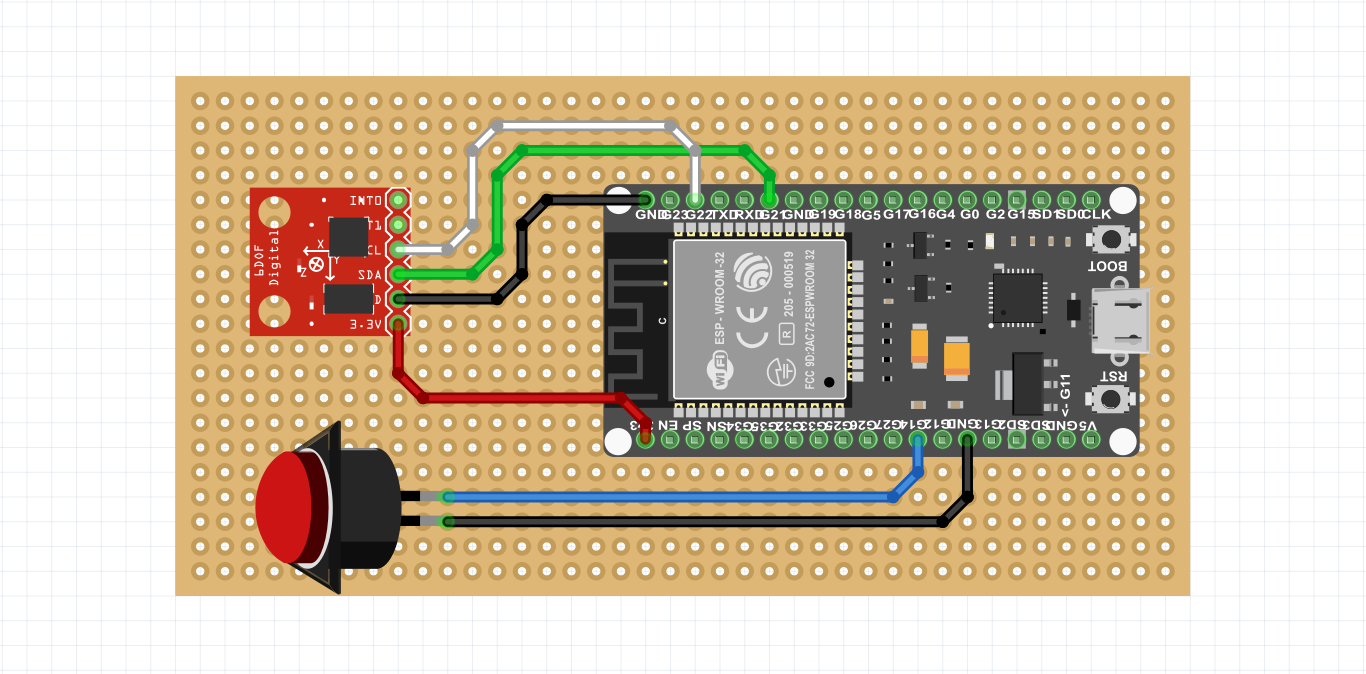
The circuit hidden in the costume prop is called, in BLE GATT terms,
the server. It uses an accelerometer to detect abrupt movements.
The sensor is calibrated so the prop can be moved freely, and only hitting it,
tapping it on the ground, or moving it aggressively will trigger a notification
to the other device.
It uses this hardware:
- 1x
ESP32 Core Board V2. Any other ESP32 dev board should work - 1x
ADXL345accelerometer development module - [optional] 1x button
Since this part is gonna be smacked around, it’s important to solder the connections together. This is my final circuit soldered on a perfboard:
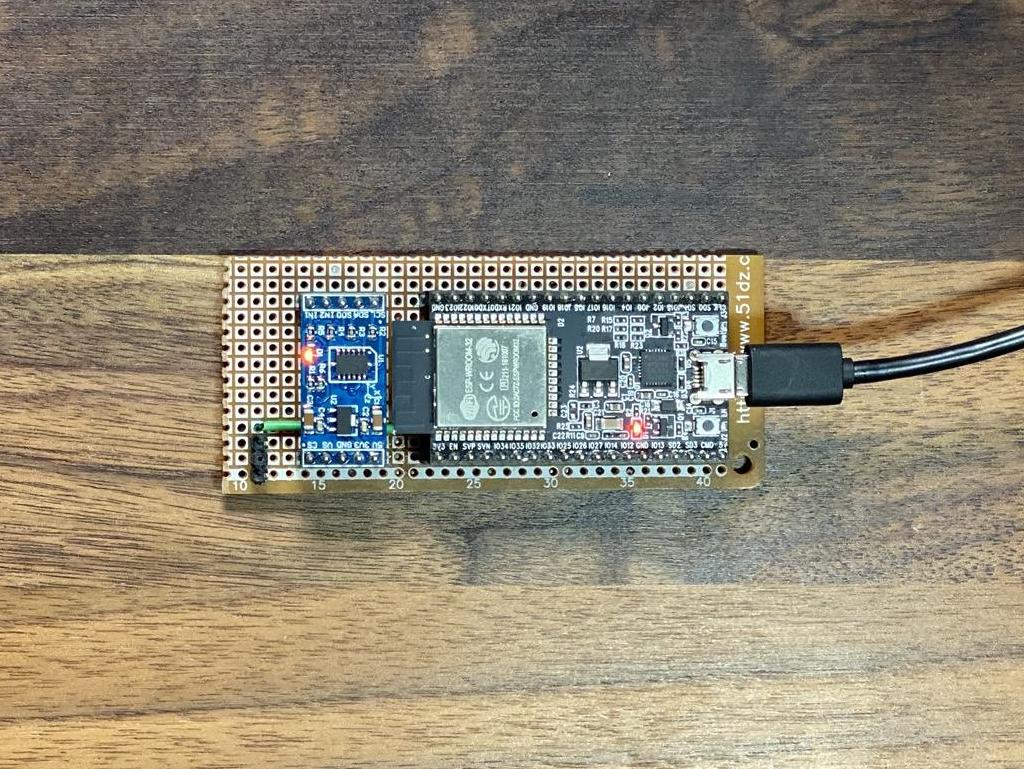
In order to avoid soldering the development boards themselves (in case we wanna use them for another project in the future), it’s a good idea to trim female pin headers like these and connect them to the dev modules. Then, solder those headers to the perfboard.
The BLE client
On the other end, there’s the GATT client. It boots, scans for servers, connects
to ours, and starts polling its attributes. Whenever it receives a notification
from the server, it simulates lightning using the LED strip, and plays thunder
sound files over the speakers. If the ambiance jumper (GPIO19) is set, it behaves
as if a notification was received every 45-65 seconds.
For a detailed explanation on how to wire the MP3 shield, check out the Arduino sketches. You may also find useful this post in oneguyblog.com. I used his audio files and some of his code for this project.
This is the hardware I used:
- 1x
ESP32 Core Board V2. Any other ESP32 dev board should work - 1x
TIP31ANPN power transistor. Used to drive the LED strip using PWM - 1x
MP3-TF-16PMP3 player module. It’s a co-processor contolled over serial to read audio files from an SD card and play them over headphones or speakers - Analog LED strip
- Some LED strips are controlled using digital signals, usually to make LED clusters individually addressable. We want one of the simpler strips, controlled directly trough the voltage you apply to it, so we can run it using PWM
- I used an RGB, common-cathode strip (4 pins: +12V, R, G, B). But RGB are shorted, so we’re controlling it like a white LED strip (2 pins: +12V, GND).
- Computer speakers
- Generics:
- Perf board
- Pin array headers
- 2x 1Kohm resistors
- Mini-jack connector
- Wire spool
- female-to-female wires (if not soldering everything)
- 1x Jumper
- Solder
- [optional] female single line headers - to avoid soldering dev modules directly
- Off the shelf:
- 12V power supply
- USB power supply - Or a 12V to 5V regulator (I recommend Traco Power)
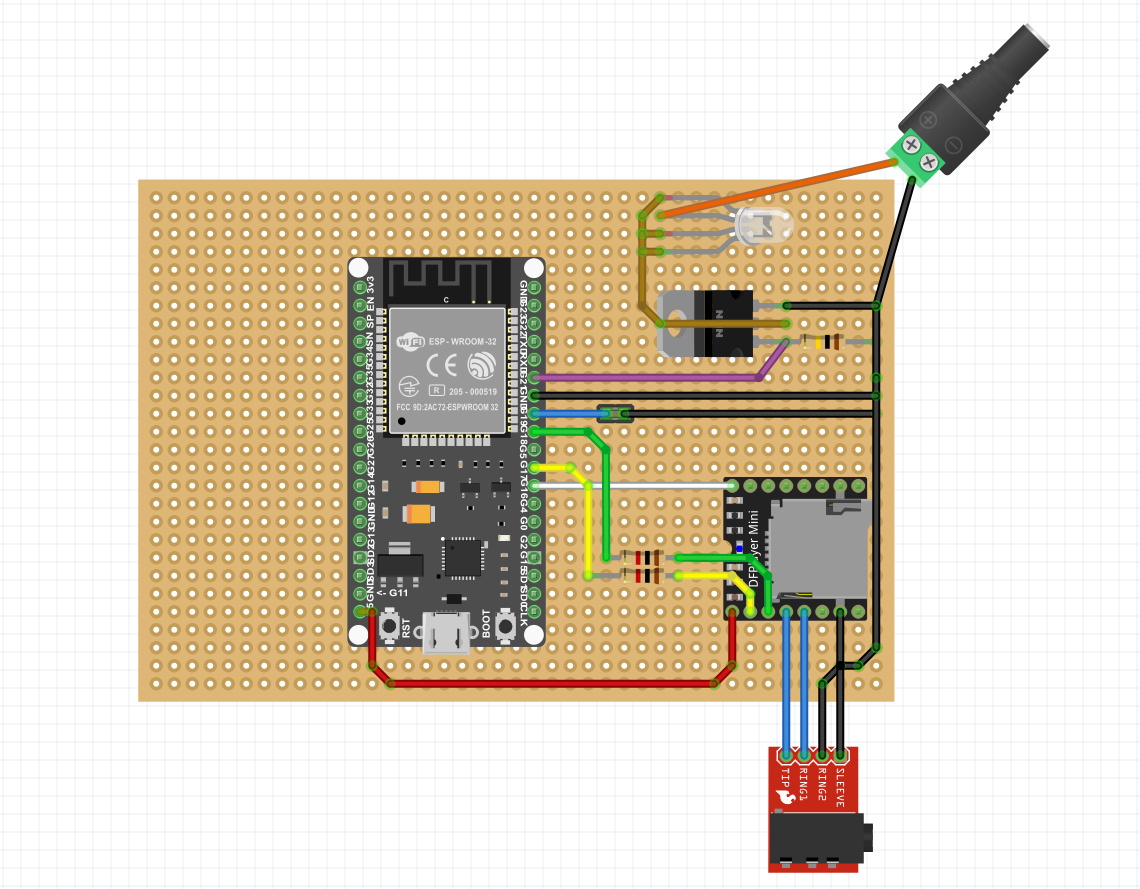
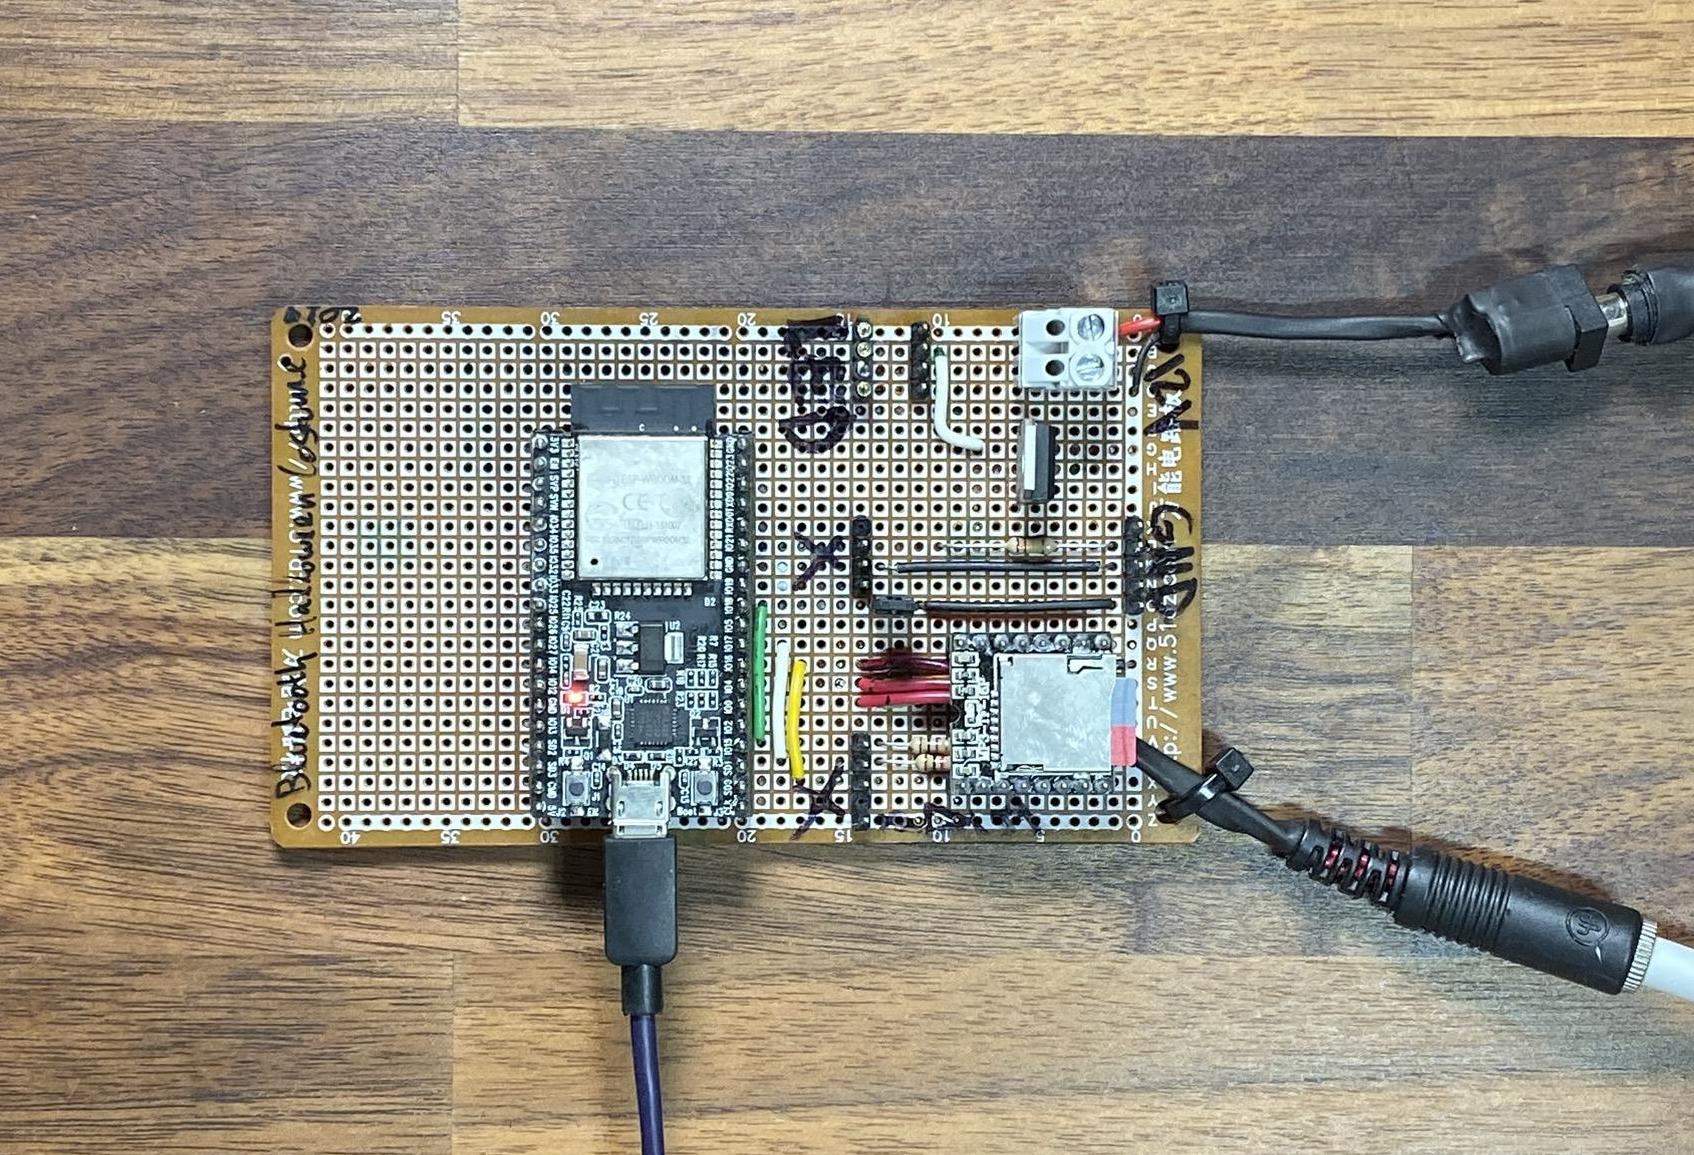
This is how it looks soldered together; the LED strip would be connected at either
one of the 2 headers labeled LED.
The Firmware
As I said, I wrote this firmware in a handful of nights. It’s heavily based on the very rudimentary BLE GATT example included with the ESP32 libraries, and includes some pieces of code gathered online. It’s not pretty, it’s imperfect, and you may have to manually reboot the BLE client at some point.
Since I may improve this firmware in the future to fix issues or add functionality, I recommend getting the code from the BLE-Halloween-Costume GitHub repository.
For the sake of completeness, and in case that GH repo ever becomes incompatible with the exact hardware described in this post, here’s a snapshot of the code in its current status:
BLE Client firmware
BLE Server firmware
Decission Making
Picking a wireless solution
There’s plenty of wireless solutions available in the market that could be used to solve this problem, from raw 433MHz radios to WiFi, LoRa, bluetooth, ZigBee…
In order to decide which one is best, first you need to lay down your requirements. These were mine; I think they apply to most costumes:
- Good for close and medium range: Approx. 15m radius, with walls and EM noise disturbing the signal
- No need for an Internet connection
- Relatively low-power consumption on the transmitter
- Modern, consumer-grade protocol
- Privacy and security are irrelevant, since this device is not critical, not dangerous, and is only gonna be used once (Watch out!)
BLE can certainly handle those requirements.
BLE can be used in different ways to optimize certain requirements: energy consumption, data throughput, etc. Using the Generic Attribute Profile (GATT), we can cover most requirements that might come up in a costume. We can send a notification whenever an event happens in the prop, and we can use attributes to report other status information (e.g. switches in the prop could set the other device’s behaviour).
If you’re using this post to build your own project, and your requirements differ from mine, make sure BLE is the right fit for you. And even if it is an appropriate choice, GATT might not be. Figure out what you need to optimize, and find out what’s the best fit.
Resources: Bluetooth Core Specification
Picking the hardware
Picking the right microcontroller and development board for a serious project is
often a huge and rather complicated task. Fortunately, this project is designed
for a single use, so my only concerns were part lead time and development time.
I was able to use only parts I already had, except for the MP3-TF-16P module.
If you’re interested in the thought process behind my hardware choices, here’s some of it:
I’m very very familiar with the ESP32 from work, I have like a dozen of them at hand, and I knew they work well with Arduino. It’s one of the most popular microcontrollers in the IoT market, specially for Proofs of Concept and DIY projects. And it also supports WiFi, which could be useful in future versions. Perfect fit for this project.
I picked the ADXL345 accelerometer because I had a few development modules at hand.
Picked the MP3-TF-16P because it was rather popular in the Arduino communities, and was available for next-day delivery.
The LED strip had to be analog and not individually addressable so we could better simmulate lightning using PWM. A white LED strip would work fine, but I only had RGB ones at hand.
The power transistor had to be beefy enough to drive all 3 channels (RGB) for
the entire LED strip, and -less importantly- fast enough to handle PWM. I already
had some TIP31As in the lab, and it can easily drive this strip’s power without
breaking a sweat. A MOSFET would be better for PWM control, but the ones I had at
hand were not beefy enough to handle the current required for my LED strip.
Everything else (power brick, perf board, resistors, pin headers…) is generic stuff I had in the lab.
Building on this
If you’d like to build your own project based on this one, here’s a few suggestions on where to start:
- Create a good costume for it (zeus, electric chair, boxer…)
- Fix connectivity issues. Under some circumstances, the client needs to be restarted to re-connect to the server
- The custom board for the client should include a 12V to 5V regulator. Feeding power from 2 different outlets is completely unnecessary
- Use GATT characteristics to set the frequency of ambiance lightning/thunder dynamically from the costume prop
- Set up more clients in your costume/props/drink/home so more things react when an event occurs
- Create 2 costumes that interact with one another
- Find a good way to run the 12V LED strip off a portable battery, and integrate another LED strip into the costume
- Use more capabilities of Bluetooth GATT to create more diverse and complex interactions
If this post was useful to you, and you decide to use it, don’t forget to send me a video of your results! :)
Also, if you’re gonna build more functionality into your system, you should really try to understand Bluetooth GATT a little better. See the resources below.
Resources
Sources:
- How to use a ESP32 development board to read from an ADXL345 accelerometer.
- Lightning and Thunder: Arduino halloween DIY project. I used this guy’s thunder sound files, and lightning emulation loop
- ESP32 Fritzing design by ‘Thomas’
Understanding Bluetooth GATT:
Technical documents:
- ESP32 Core Board v2 docs: Includes the schematics, a Getting Started guide and more
- TIP31A datasheet
- MP3-TF-16P datasheet
- ADXL345 datasheet